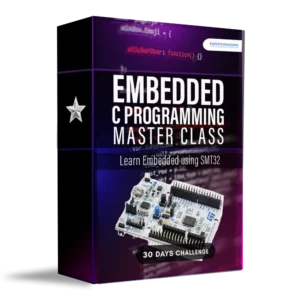
3 Month Internship on Embedded Systems
Embedded C + Embedded System Design + ARM Cortex M4 + Internet of Things + PCB Design
What you will learn
Internship in Embedded C :
- Day 1- Introduction to Embedded C
- Day 2- Understanding Microcontroller Programming:
- Day 03 – Address Variables and Storage Classes
- Day – 04 How to Write functions
- Day – 05 Understanding Microcontroller programming
- Day – 06 Build Process and Analyzing Embedded C Code
- Day – 07 Floating Point data and Scanf
- Day – 08 Pointers and stdint.h
- Day – 09 Operators
- Day – 10 Decision Taking Statements
- Day – 11- Loops
- Day – 12 – Structures
- Day – 13 Typedef with Structure
- Day – 14 Arrays
- Day – 15 Type Qualifier
- Day – 16 Strings
- Day – 17 Blinking LED
- Day – 18 Bitwise Operators
- Day – 19 STM32 Cube IDE
- Day – 20 Structures and Bit field
- Day – 21 Structure and Union
- Day -22 Keypad Interfacing
- Day – 23 UART Programming in C -Part1
- Day – 24 UART Programming in C (Building from Scratch) -Part2
- Day – 25 UART Programming in C (Using ST Headerfile)
- Day – 26 LCD Interface using STM32F411
- Day 27- I2C Interface with ADXL345 -Part1
- Day – 28 I2C Interface with ADXL345 -Part2
- Day – 29 SPI Interface with ADXL345
Internship in Embedded System & IoT :
- Day 1: Introduction to Embedded System Design
- Day 2: Choosing the Right Processor for Embedded System Design
- Day 3: Challenges, Build Tools, Test and Measurement Equipment’s for Embedded System Design
- Day 4: Introduction to RTOS
- Day 5: Introduction to IoT, Architecture and Applications
- Day 6: 8051 Architecture and Design
- Day 7: Introduction to Keil, Led, Switch Interface with 8051
- Day 8: UART Interface, SPI Interface – 8051
- Day 9: LCD & I2C Interface with 8051
- Day 10: Bluetooth Control Home Automation using 8051
- Day 11: Introduction to ARM Architecture
- Day 12: Interfacing LED & Switch with ARM7 LPC2148
- Day 13: Interfacing UART With LPC2148
- Day 14: Interfacing LCD with ARM7 LPC2148
- Day 15: IoT Based Weather Monitoring System using ARM7
- Day 16: Introduction to Cortex M4 Architectures
- Day 17: Interfacing LED, Switch, and Buzzer with LPC4088
- Day 18: Interfacing UART With LPC4088
- Day 19: Interfacing LCD with LPC4088
- Day 20: Temperature Monitoring using LORA
- Day 21: Introduction to PIC Microcontrollers
- Day 22: Introduction to MPLAB IDE and LED Blinking
- Day 23: Interfacing LED, Switch, Buzzer, Relay, and UART
- Day 24: Interfacing LCD With PIC
- Day 25: DC Motor Control using PIC
- Day 26: Introduction to NodeMCU
- Day 27: IoT Temperature Monitoring and Forest Fire Detection using NodeMCU
- Day 28: Home Automation using NodeMCU – Blynkapp
- Day 29: Home Automation using NodeMCU and Google Assistant
- Day 30: Conclusion and Wrap-up
Internship in Arm Cortex M4 :
- Day 1- Introduction to Embedded System
- Day 2 Choosing the Right Processor
- Day 3 Introduction to Cortex M4 Architecture
- Day 4 What is IDE & Installation, Creating a simple project
- Day 5 Real-time Debugging in STM32F411
- Day 6 Introduction to GPIO
- Day 7 Blinking LED and Switch
- Day 8 Memory Map and Bus Interface of Cortex Mx Processor
- Day 9 Understanding Stack Memory
- Day 10 Exception Model of ARM Cortex Mx Processor
- Day 11 Understanding Startup File
- Day 12 Understanding Linker Scripts
- Day 13 Fault Handling and Analysis
- Day 14 UART -PART 1
- Day 15 UART -PART 2
- Day 16 Interrupt Programming
- Day 17 System Tick Timer
- Day 18 Implementation of Task Scheduler
- Day 19 Implementation of Task Scheduler -Part 2
- Day 20 ADC
- Day 21 LCD
- Day 22 PWM
- Day 23 I2C -PART 1
- Day 24 I2C -PART 2
- Day 25 I2C -PART 3-DEMO
- Day 26 SPI -PART 1
- Day 27 SPI -PART 2
- Day 28 Bluetooth Based Home Automation
- Day 29 Data Monitoring using STM32 and Thingspeak cloud
- Day 30 Graduation Day
Internship in PCB Design :
- Introduction to PCB Design and Terminologies and Installation of Orcad Trail Version
- Introduction to Schematic Capture
- Introduction to Allegro and Footprint Creation
- Importing Schematics in allegro, Placement, and route
- Gerber Creation, BOM, PDF
- How to Design an 8051 Microcontroller Board
- Library Creation
- Schematics Design
- Footprint Creation
- Design rules check-Import and Placement
- Layout
- Layout Design , Gerber Creation, Recap, schematic design consideration, Layout Design Consideration
Internship in Internet of Things
IoT Introduction and Architectures
✅DAY–1 Introduction to IoT
✅DAY–2 IoT Communication Protocols
✅DAY–3 Introduction to ESP32 and NodeMCU
✅DAY–4 Iot Clouds,Analytics & Datascience
✅DAY–5 Sensors for IoT
IoT using Thingspeak
✅DAY – 6 Sending Data to Thingspeak -Arduino+Humidity+Air quality(Weather monitoring system)
✅DAY – 7 How to Analyze IoT Data in ThingSpeak
✅DAY – 8 Deploying a Machine learning Model on the Cloud
✅DAY – 9 Thingspeak for IoT in agriculture
✅DAY – 10 Smart Humidity Sensor – ThingSpeak, MATLAB, and IFTTT
IoT with Microsoft Azure
✅DAY– 11 Introduction to IoT with Microsoft Azure
✅DAY– 12 Implementing IoT with Azure
✅DAY– 13 Edge Computing and Analytics
✅DAY– 14 Coginitive services,Computer vision API
✅DAY– 15 Weather monitoring station using Microsoft Azure and Arduino
Iot Projects and Case Study
✅Day-16 Home automation using Google Assistant
✅Day-17 Industrial Iot using Zigbee and WIFI(Windmill case study)
✅Day-18 Recording sensor data to google sheet using IFTTT with Arduino and sending alerts
✅Day-19 Real time Video surveillance esp32cam and Blynk App
✅Day-20 Predictive Maintenance of a Duct Fan Using Nodemcu, ThingSpeak and MATLAB
IoT with AWS IoT
✅Day 21 Introduction to AWS IoT,Setting up Free tier AWS, AWS CLI, Policys, Security Credentials, and Testing
✅Day 22 Raspberry PI3 with AWS IOT SDK
✅Day 23 SNS Push Notifications,AWS IoT Analytics
✅Day 24 AWS Lambda Functions for IoT
✅Day 25 HTTPs Arduino sketch to AWS IoT Core for the ESP8266 and ESP32
✅Day 26 Using Mongoose OS on embedded devices for AWS IoT
✅Day 27 Storing data into the Dynamo Database from the AWS IoT control panel
✅Day 28 AWS Quicksight for data analytics and visulizations
✅Day 29 AWS Device Shadows and multiple Pub/Sub’s
✅Day 30 Weather monitoring station using AWS IOT
What you will get
✅ Complete Video recordings of the course
✅ All attachment Download – PPT,
✅ Private Community Access
✅ E-Internship Certificate
✅ Lifetime course validity
Sample Internship Certificate
Frequently asked questions
- Once I have Done the Payment where should I access the course?
After the payment is done. Please signup to learn.pantechsolutions.net using the same mail id used for payment. - Where can I access the course?
You can access the courses in our learning portal learn.pantechsolutions.net - What is the validity of the course?
Each course’s validity varies from each plan you have chosen. - Is it only Self Paced Learning or I will get a Live session?
It is a Self-paced Learning. Apart from that you will be having live sessions on Mastermind - Where can I clear my doubts?
You can clear doubts in Weekly Mastermind Session. - Will you provide job opportunities?
We will provide all the skillset that is needed to get a job - Can I Take More than One Course at a Time?
Yes, you can each progress of the course will be noted respectively. - My Payment Did Not Go Through. What Do I Do?
Please Mail us to learn@warriorsway.in - When do I get my internship Certificate?
The internship Certificate will be generated automatically in the portal after completing the course for 100% . you can download from the portal for the respective course.


Reviews
There are no reviews yet.